
In previous article we discuss about how to create VPC, subnet, Internet gateway, route tables, NAT device, and security group. In this session I would like to discuss about how to create instance in AWS and connecting all of the stuff that we created. I strongly suggest to read Playing with VPC AWS (Part 1) if you want to follow this tutorial.
Use Case
In order to refresh our mind, let’s take a look the use case that we want to build in picture below:

Let say we want to run 2 instances. The first instance is a web server which is located in public subnet. The second instance is a database which is located in private subnet and only available when it is being called from web server. Please follow below steps.
Create Key Pair
- First, you need generate RSA in your computer. You can use this command:
$
$ ssh-keygen -t rsa
$
- Then, you need to login into your AWS account
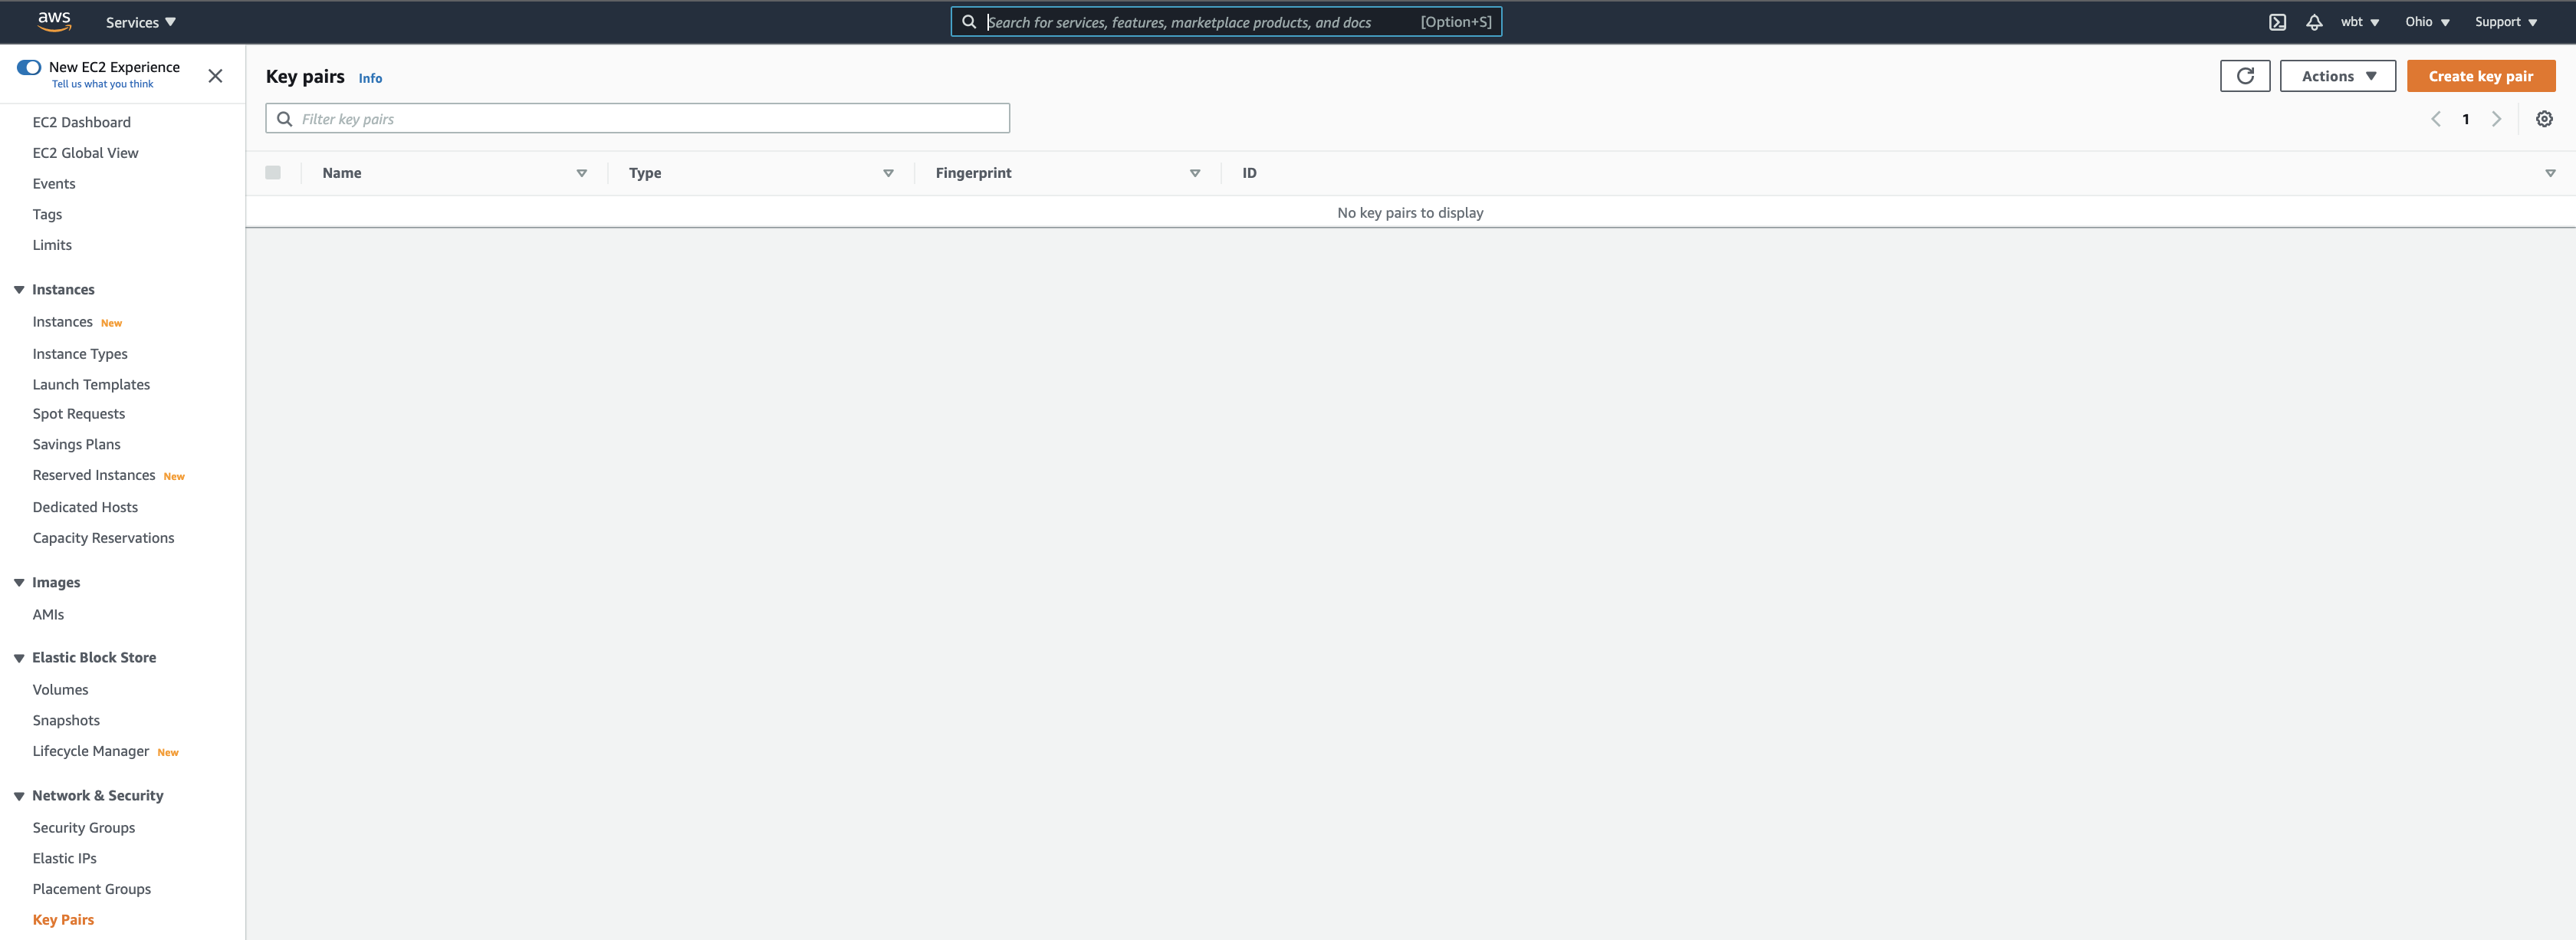
- Under Network & Security menu, choose Key Pairs and click Actions button on the top right. Then choose Import key pair.
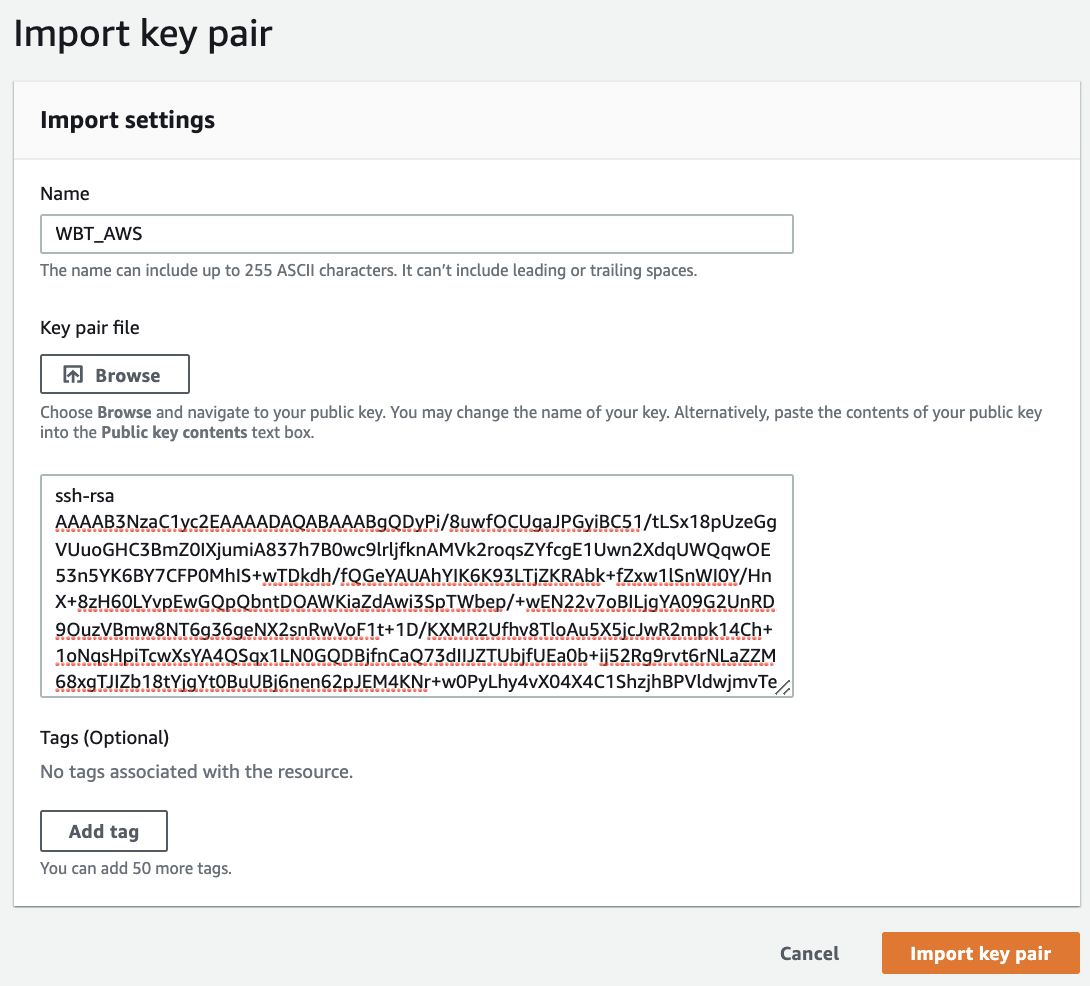
- Fill key pair name, copy your public key in the text area and click Import key pair button.
Create Web Server Instance
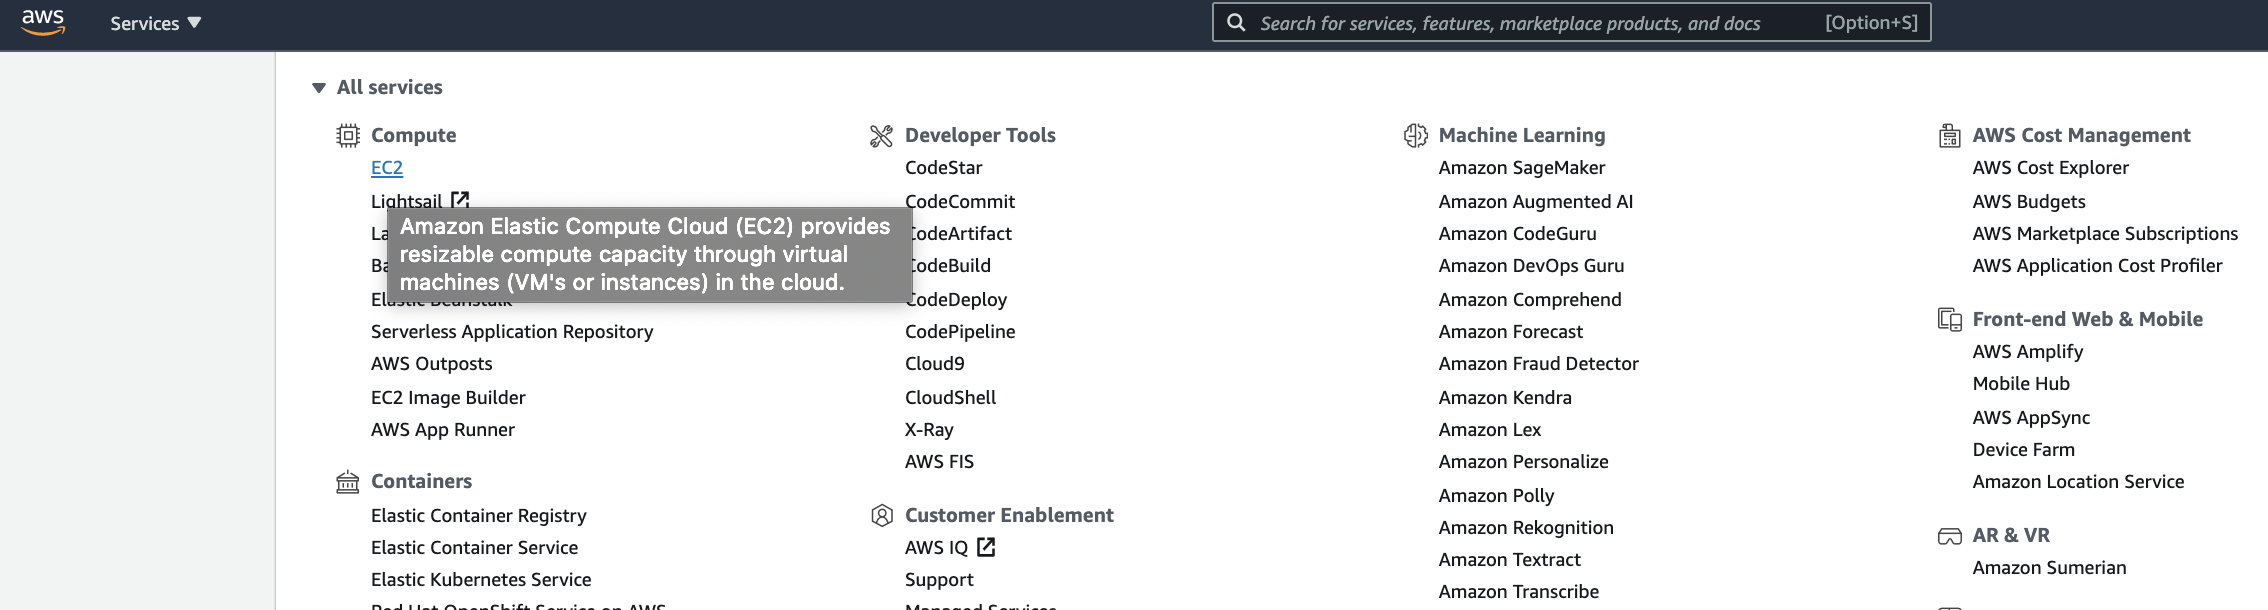
- In AWS Management Console page, choose EC2 menu under Compute.

- Once you open EC2 dashboard, choose Instances menu and click Launch instances button on the top right.
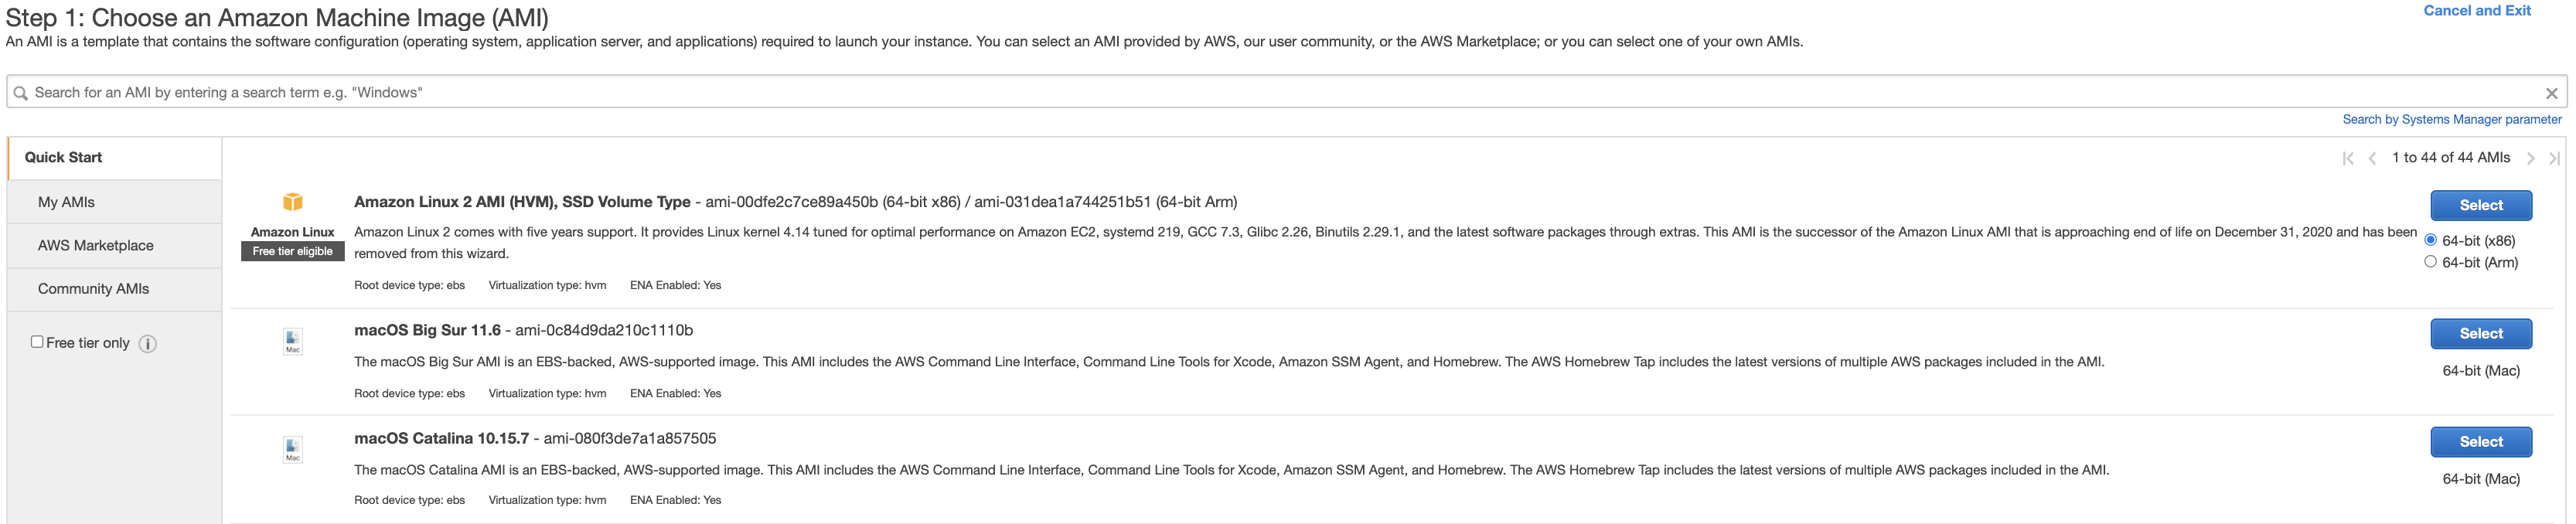
- Select Amazon Linux 64-bit (x86) as your image, but you can choose other image if you want.
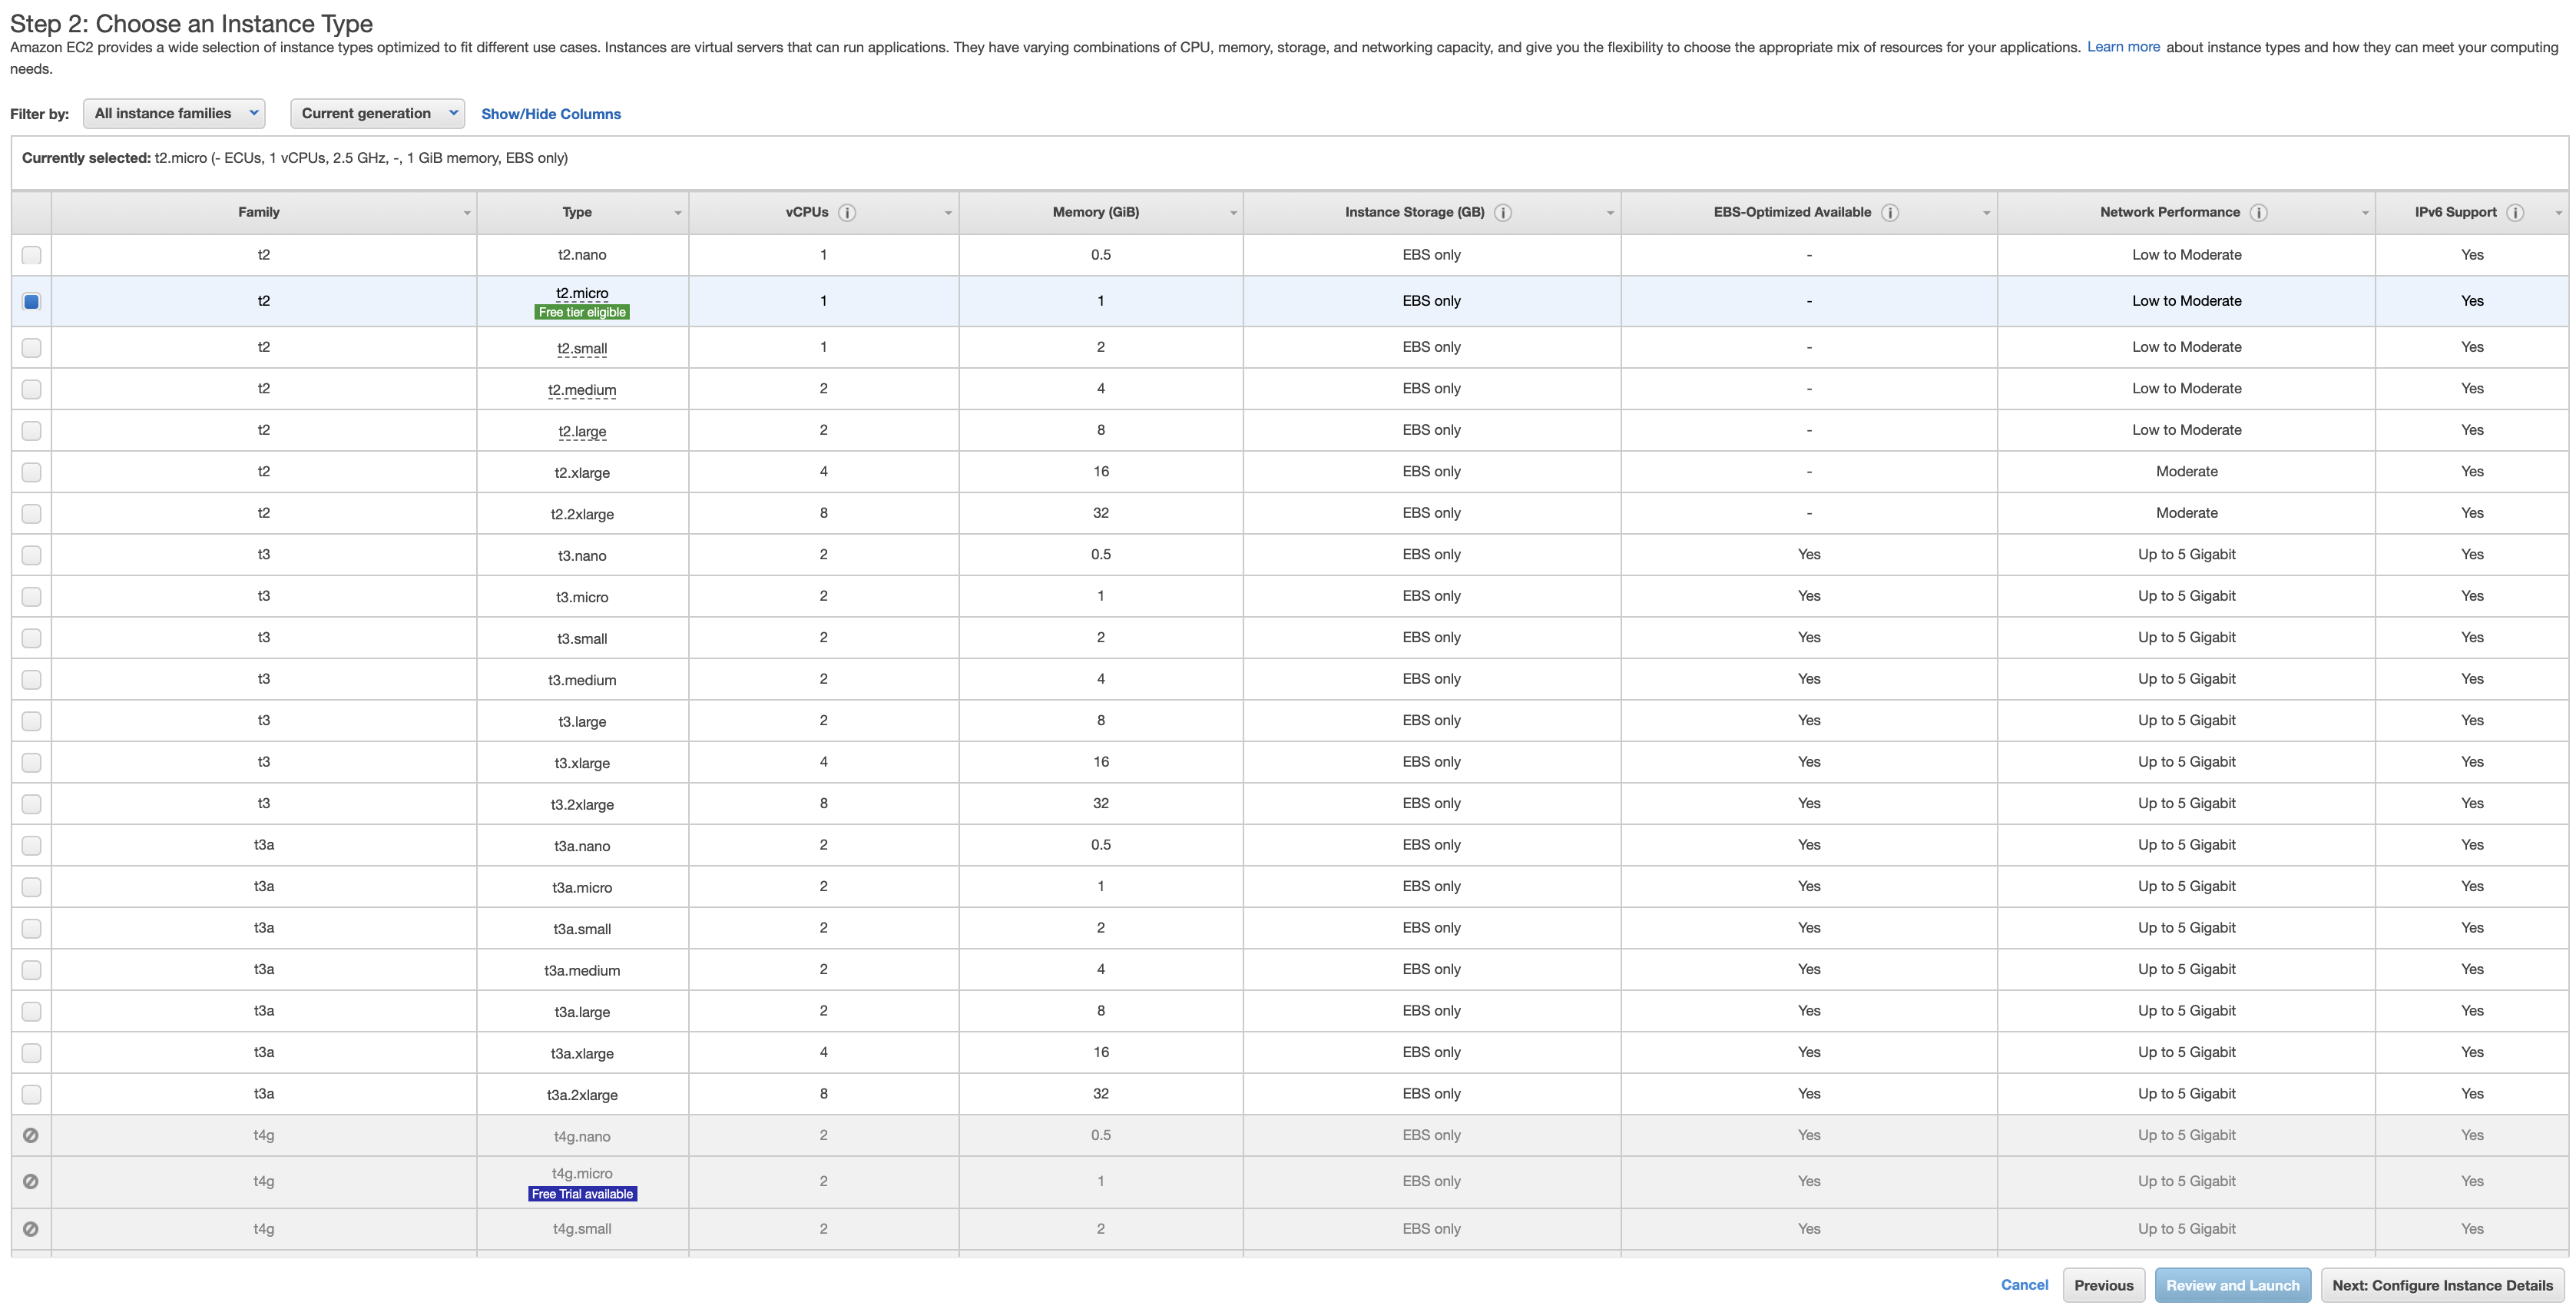
- Choose an instance type based on your need, in this case I choose the free instance type (t2.micro) which has 1 CPU and RAM 1 GB. After that, click Next: Configure Instance Details button.
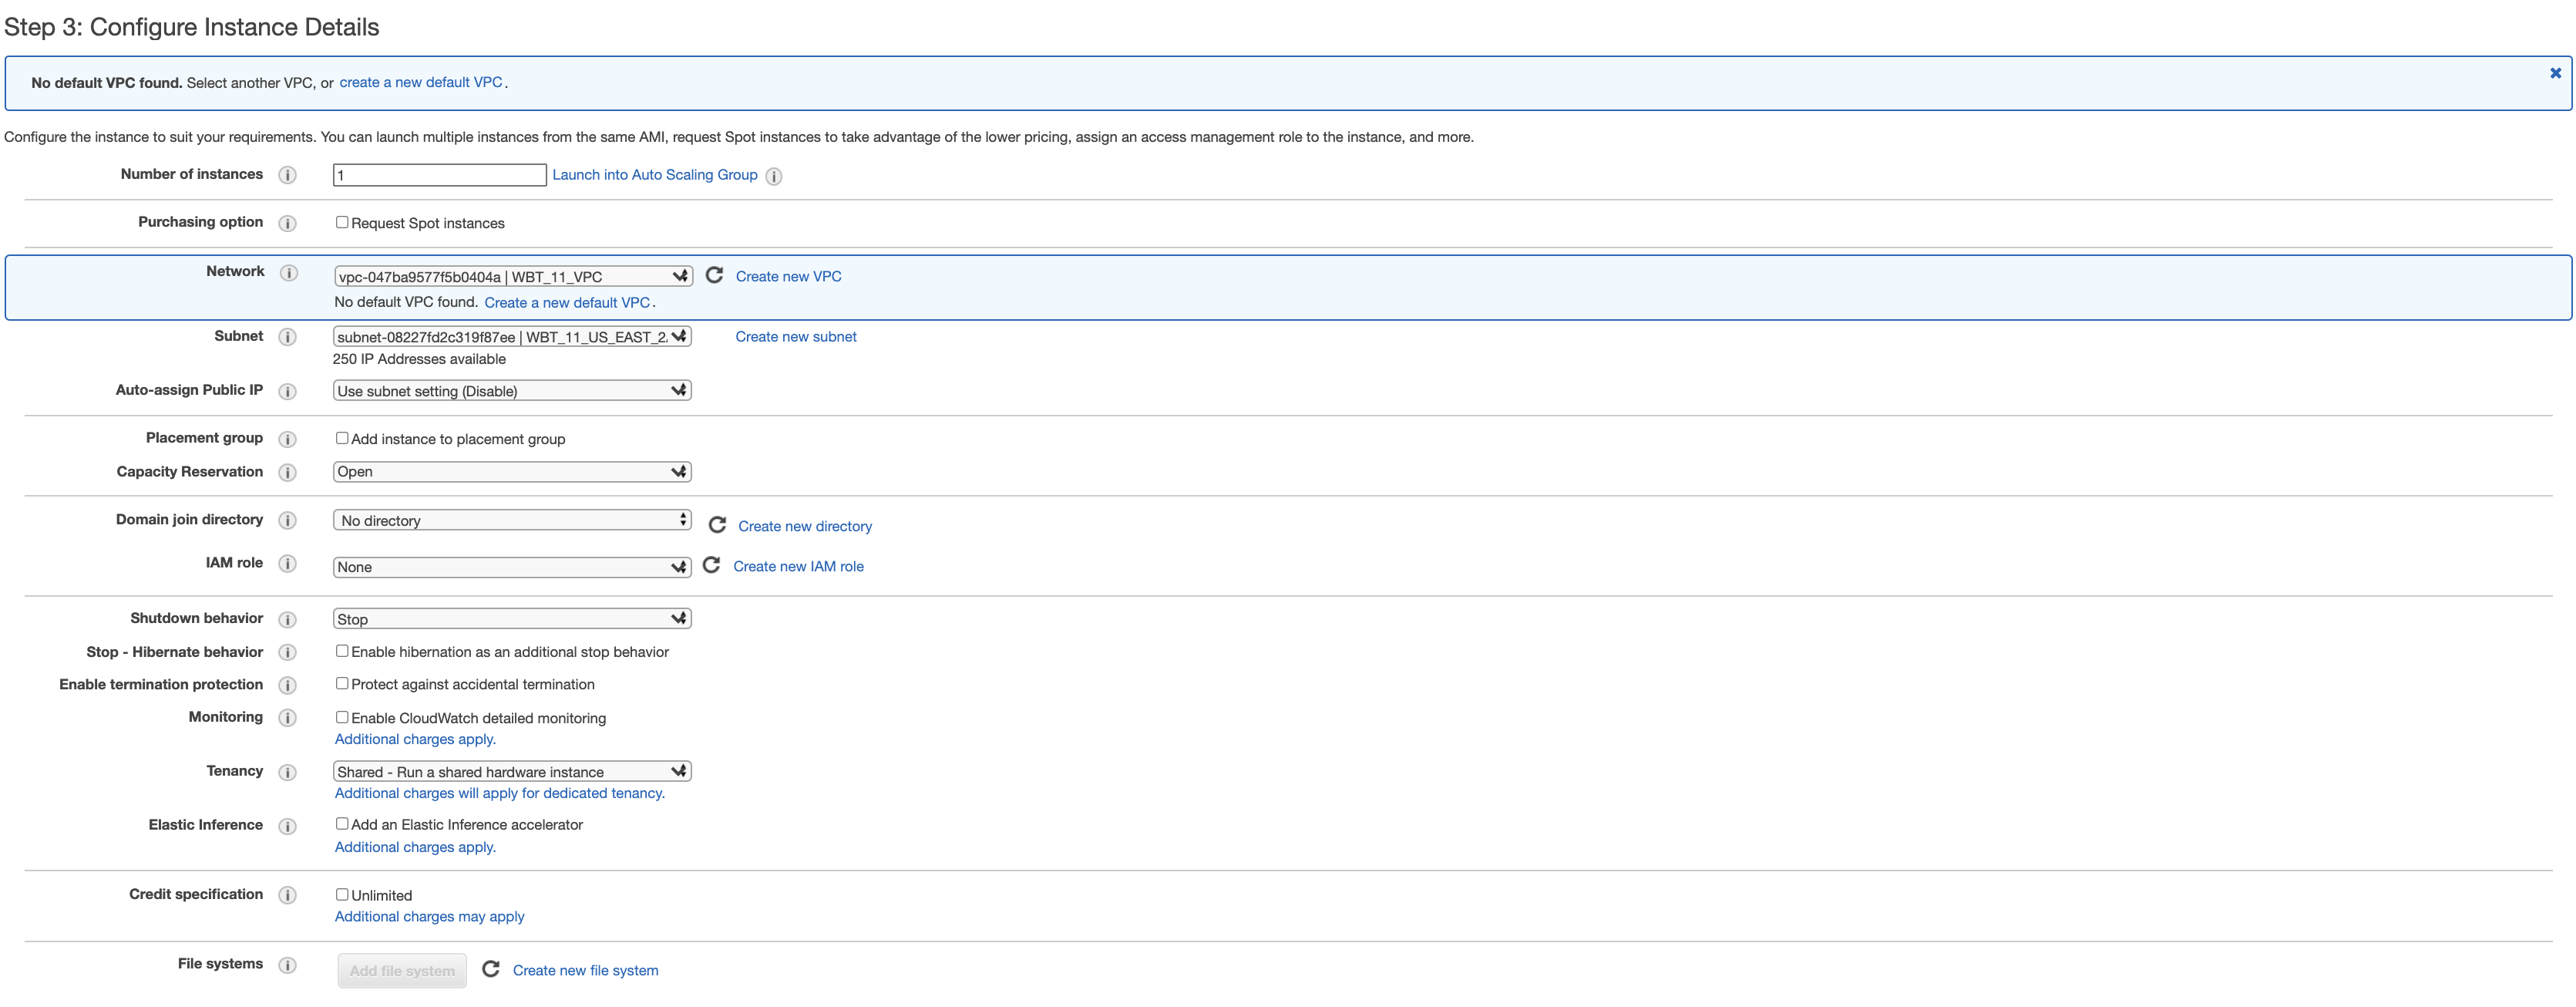
- Choose your VPC that you created in Network field.
- Choose your public subnet that you created in Subnet field.
- Click Next: Add Storage button on the bottom right.
- Let’s use default configuration for storage. Click Next: Add Tags button on the bottom right.
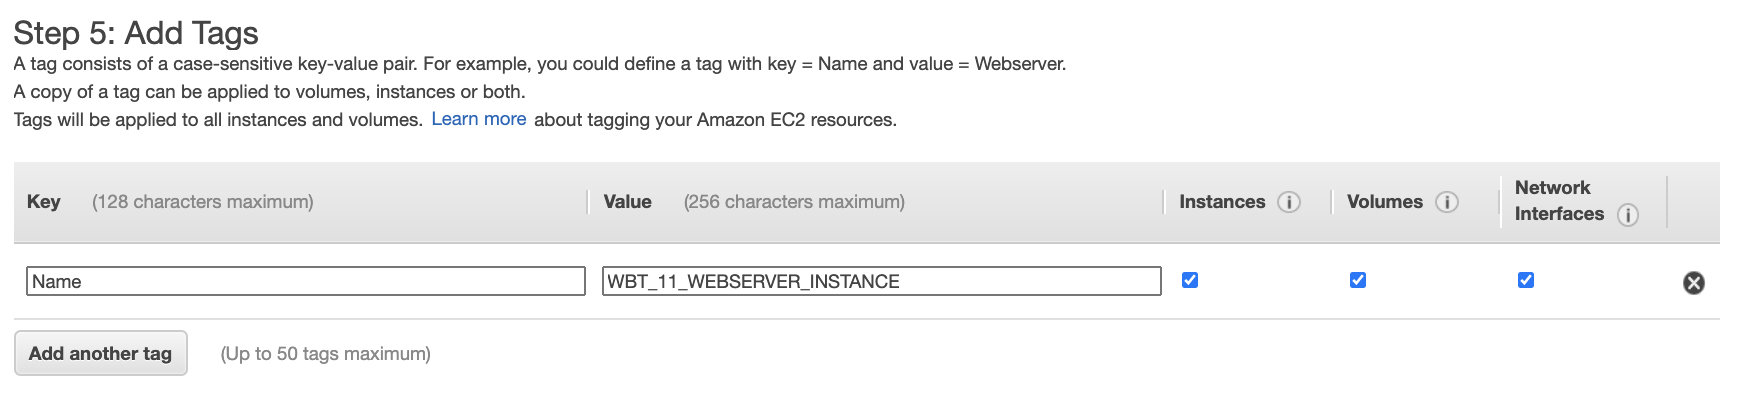
- On Add Tags tab, add tag with key Name and Value (example WBT_11_WEBSERVER_INSTANCE) for easier tracking. Click Next: Configure Security Group button on the bottom right.

- Select and existing security group and choose security group for web server that we created before. Click Review and Launch button on the bottom right.
- Once you review your configuration, click Launch button.
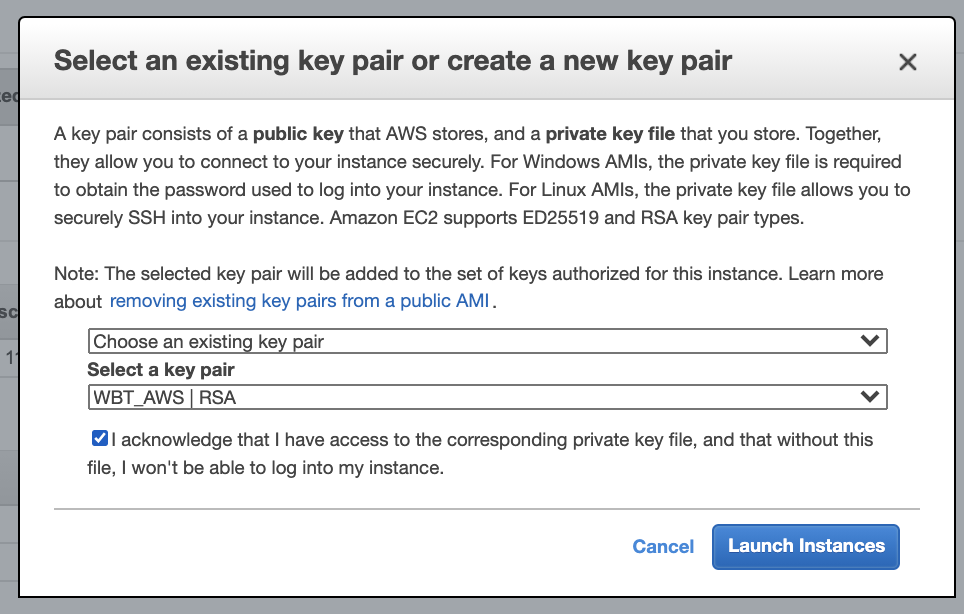
- Choose key pair that we created before and click Launch Instances button.
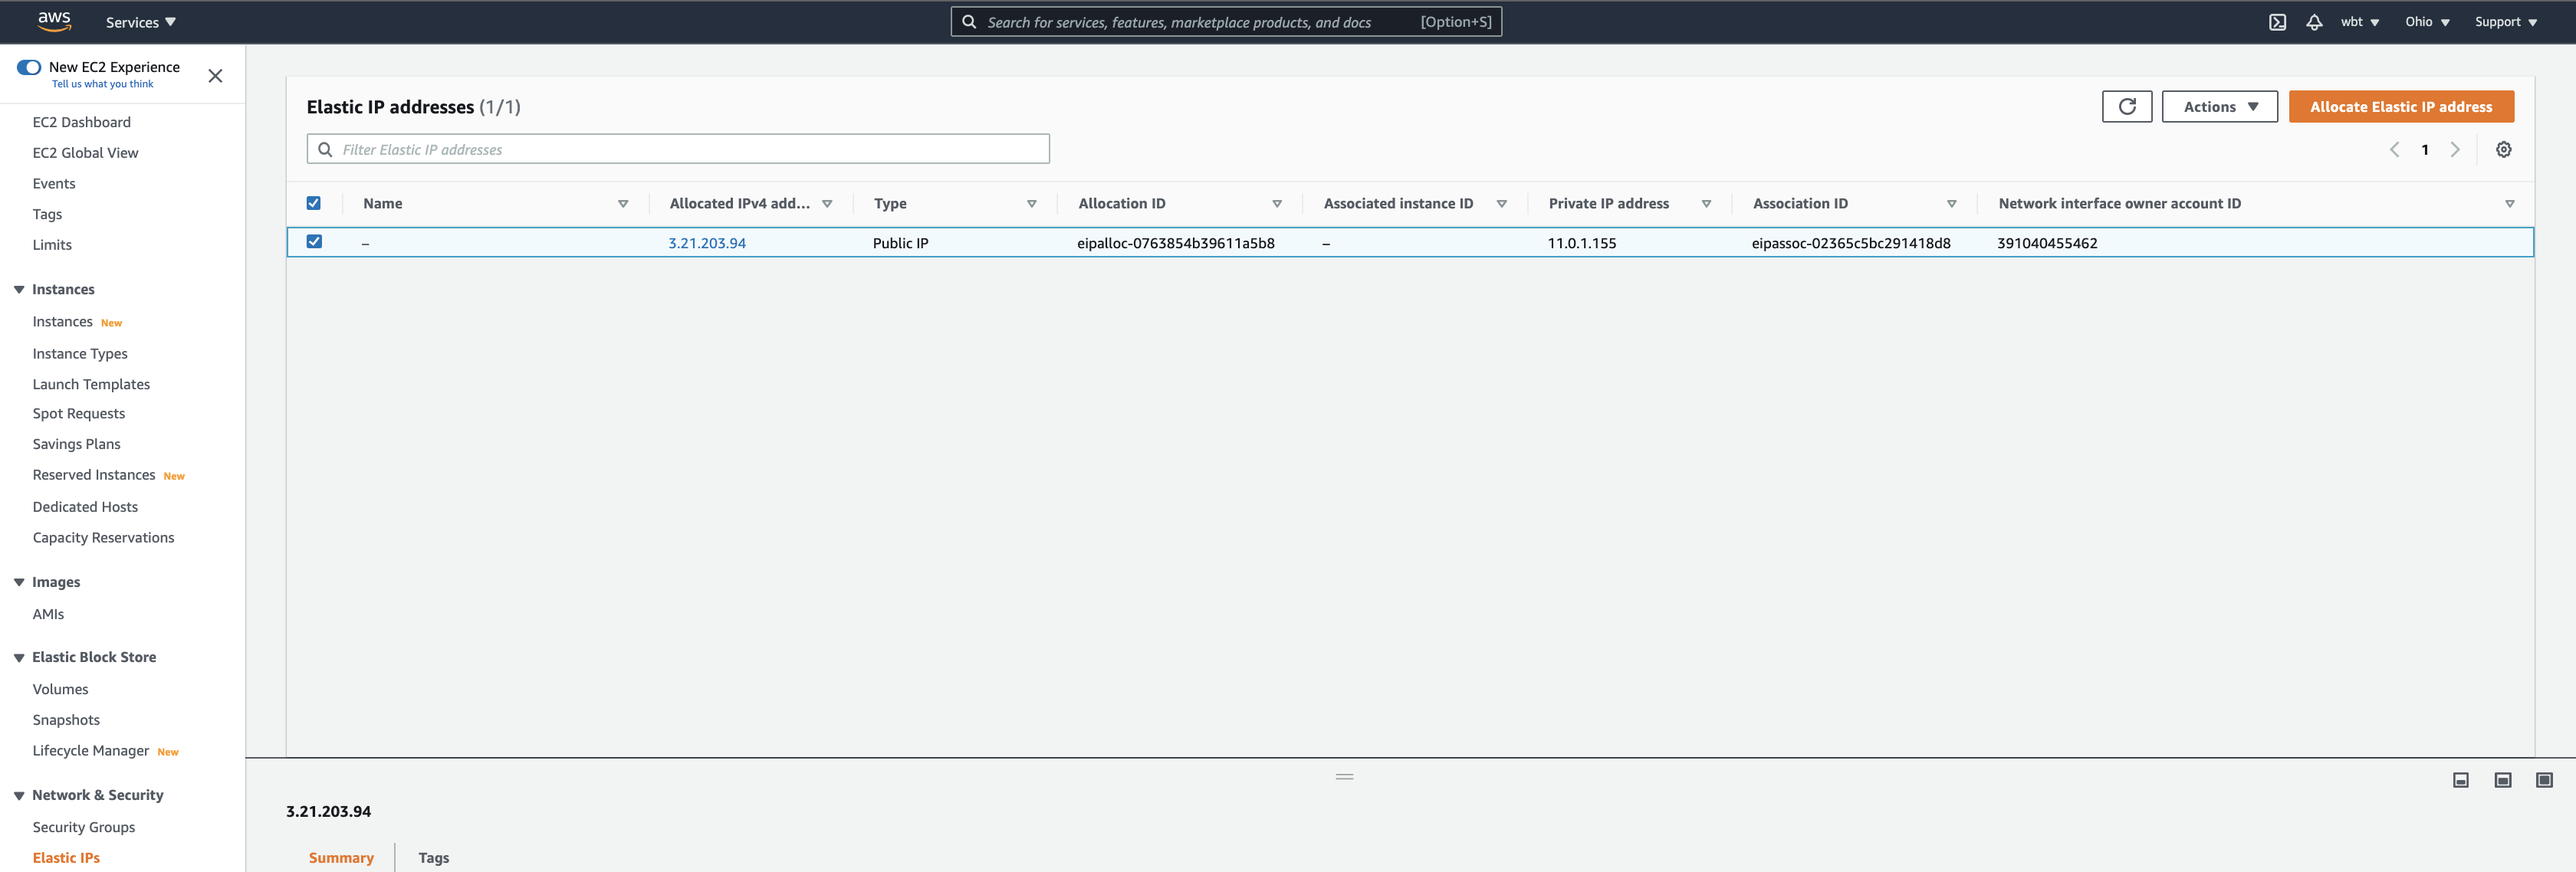
- Now, open Elastic IPs under Network & Security menu. There is our Elastic IP that we created before and associated with network interface. Lets create another one by clicking Allocate Elastic IP address button on the top right.
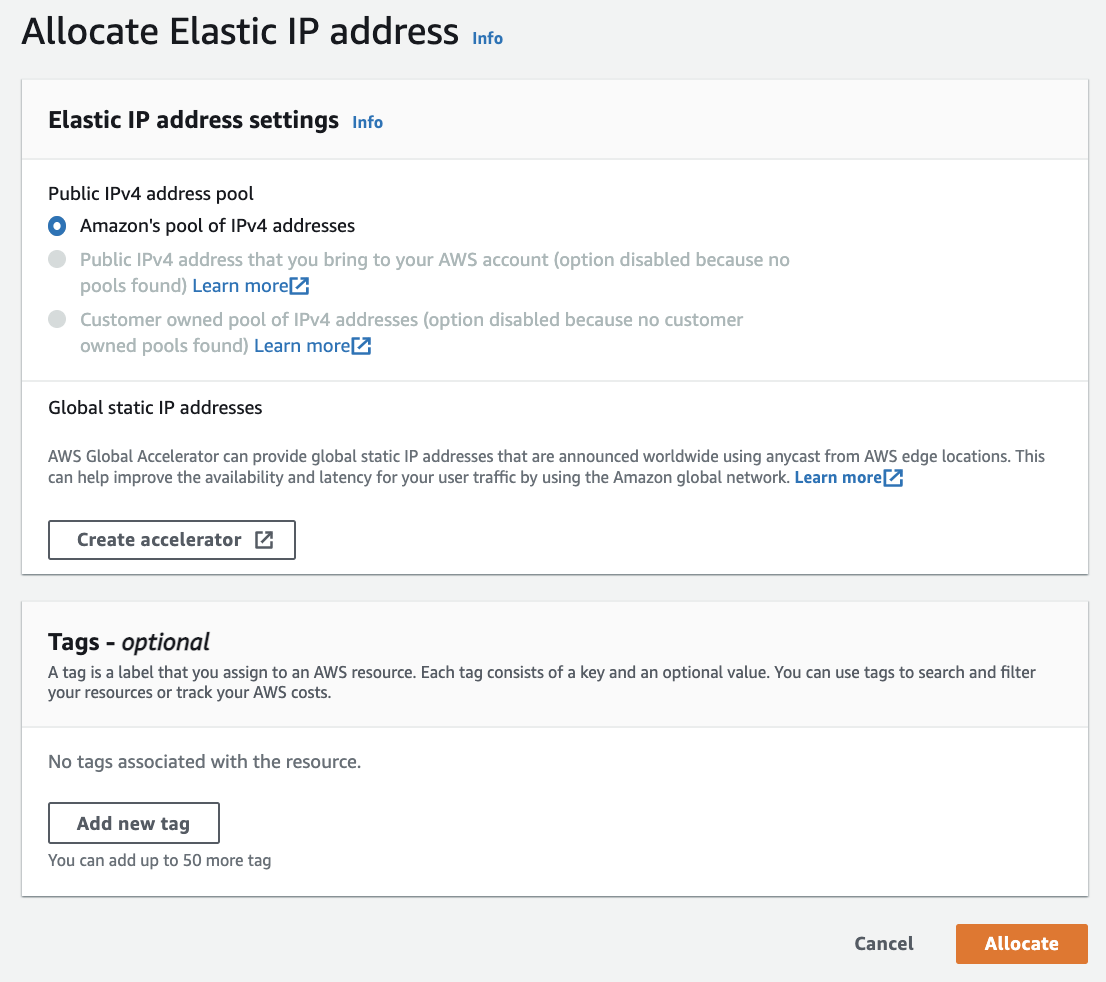
- In this case I use default Amazon’s pool of IPv4 addresses and click Allocate button.
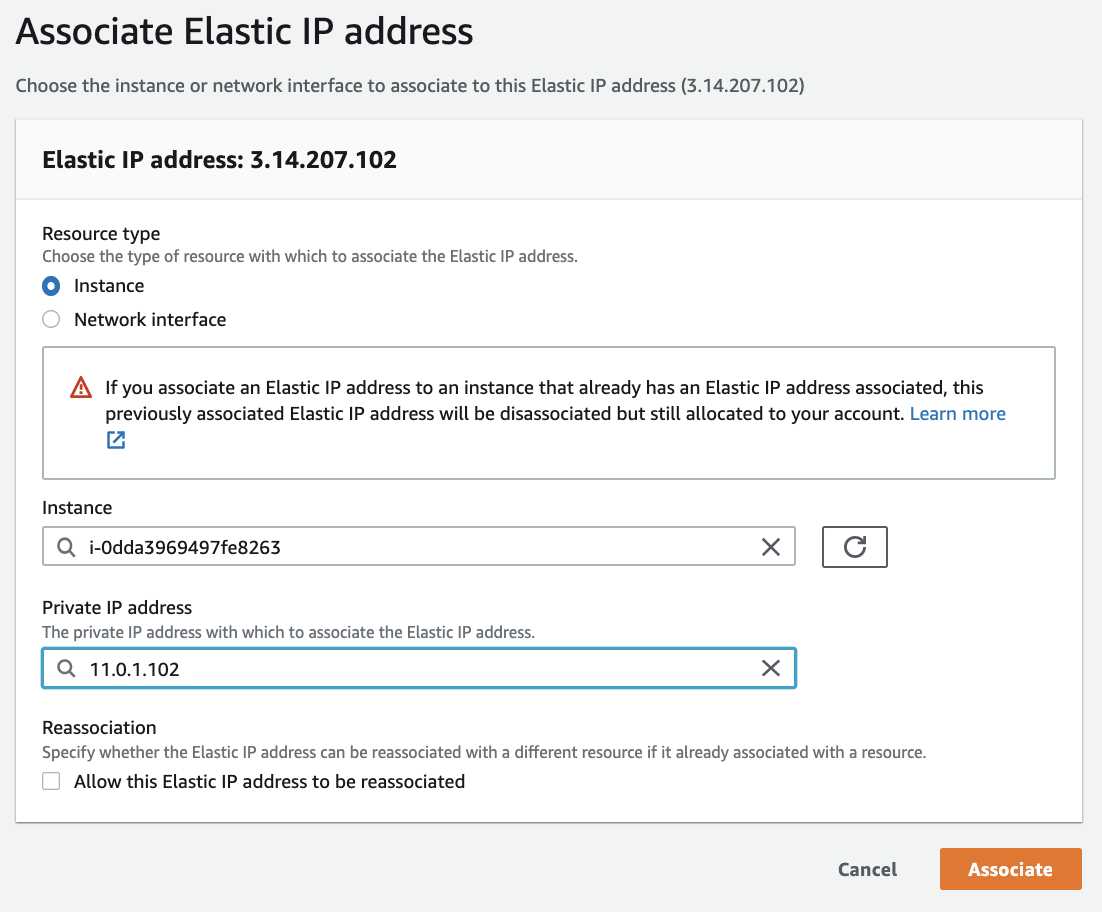
- Once you allocate EIP, associate it web server instance that we created before and click Associate button. Example: 3.14.207.102.
- Once you associated EIP with the instance, you can verify it by doing ssh
> ssh ec2-user@3.14.207.102 -i aws_rsa

       __|  __|_  )
       _|  (     /   Amazon Linux 2 AMI
      ___|\___|___|

https://aws.amazon.com/amazon-linux-2/
11 package(s) needed for security, out of 35 available
Run "sudo yum update" to apply all updates.
[ec2-user@ip-11-0-1-108 ~]$
Create Database Instance

- Let’s create another instance for database. Choose Instances menu and click Launch instances button on the top right.

- The same with web server instance, in this case I select Amazon Linux 64-bit (x86) image.

- On Step 2: Choose an Instance Type tab, I use free instance type t2.micro. Then click Next: Configure Instance Details button on the bottom right.
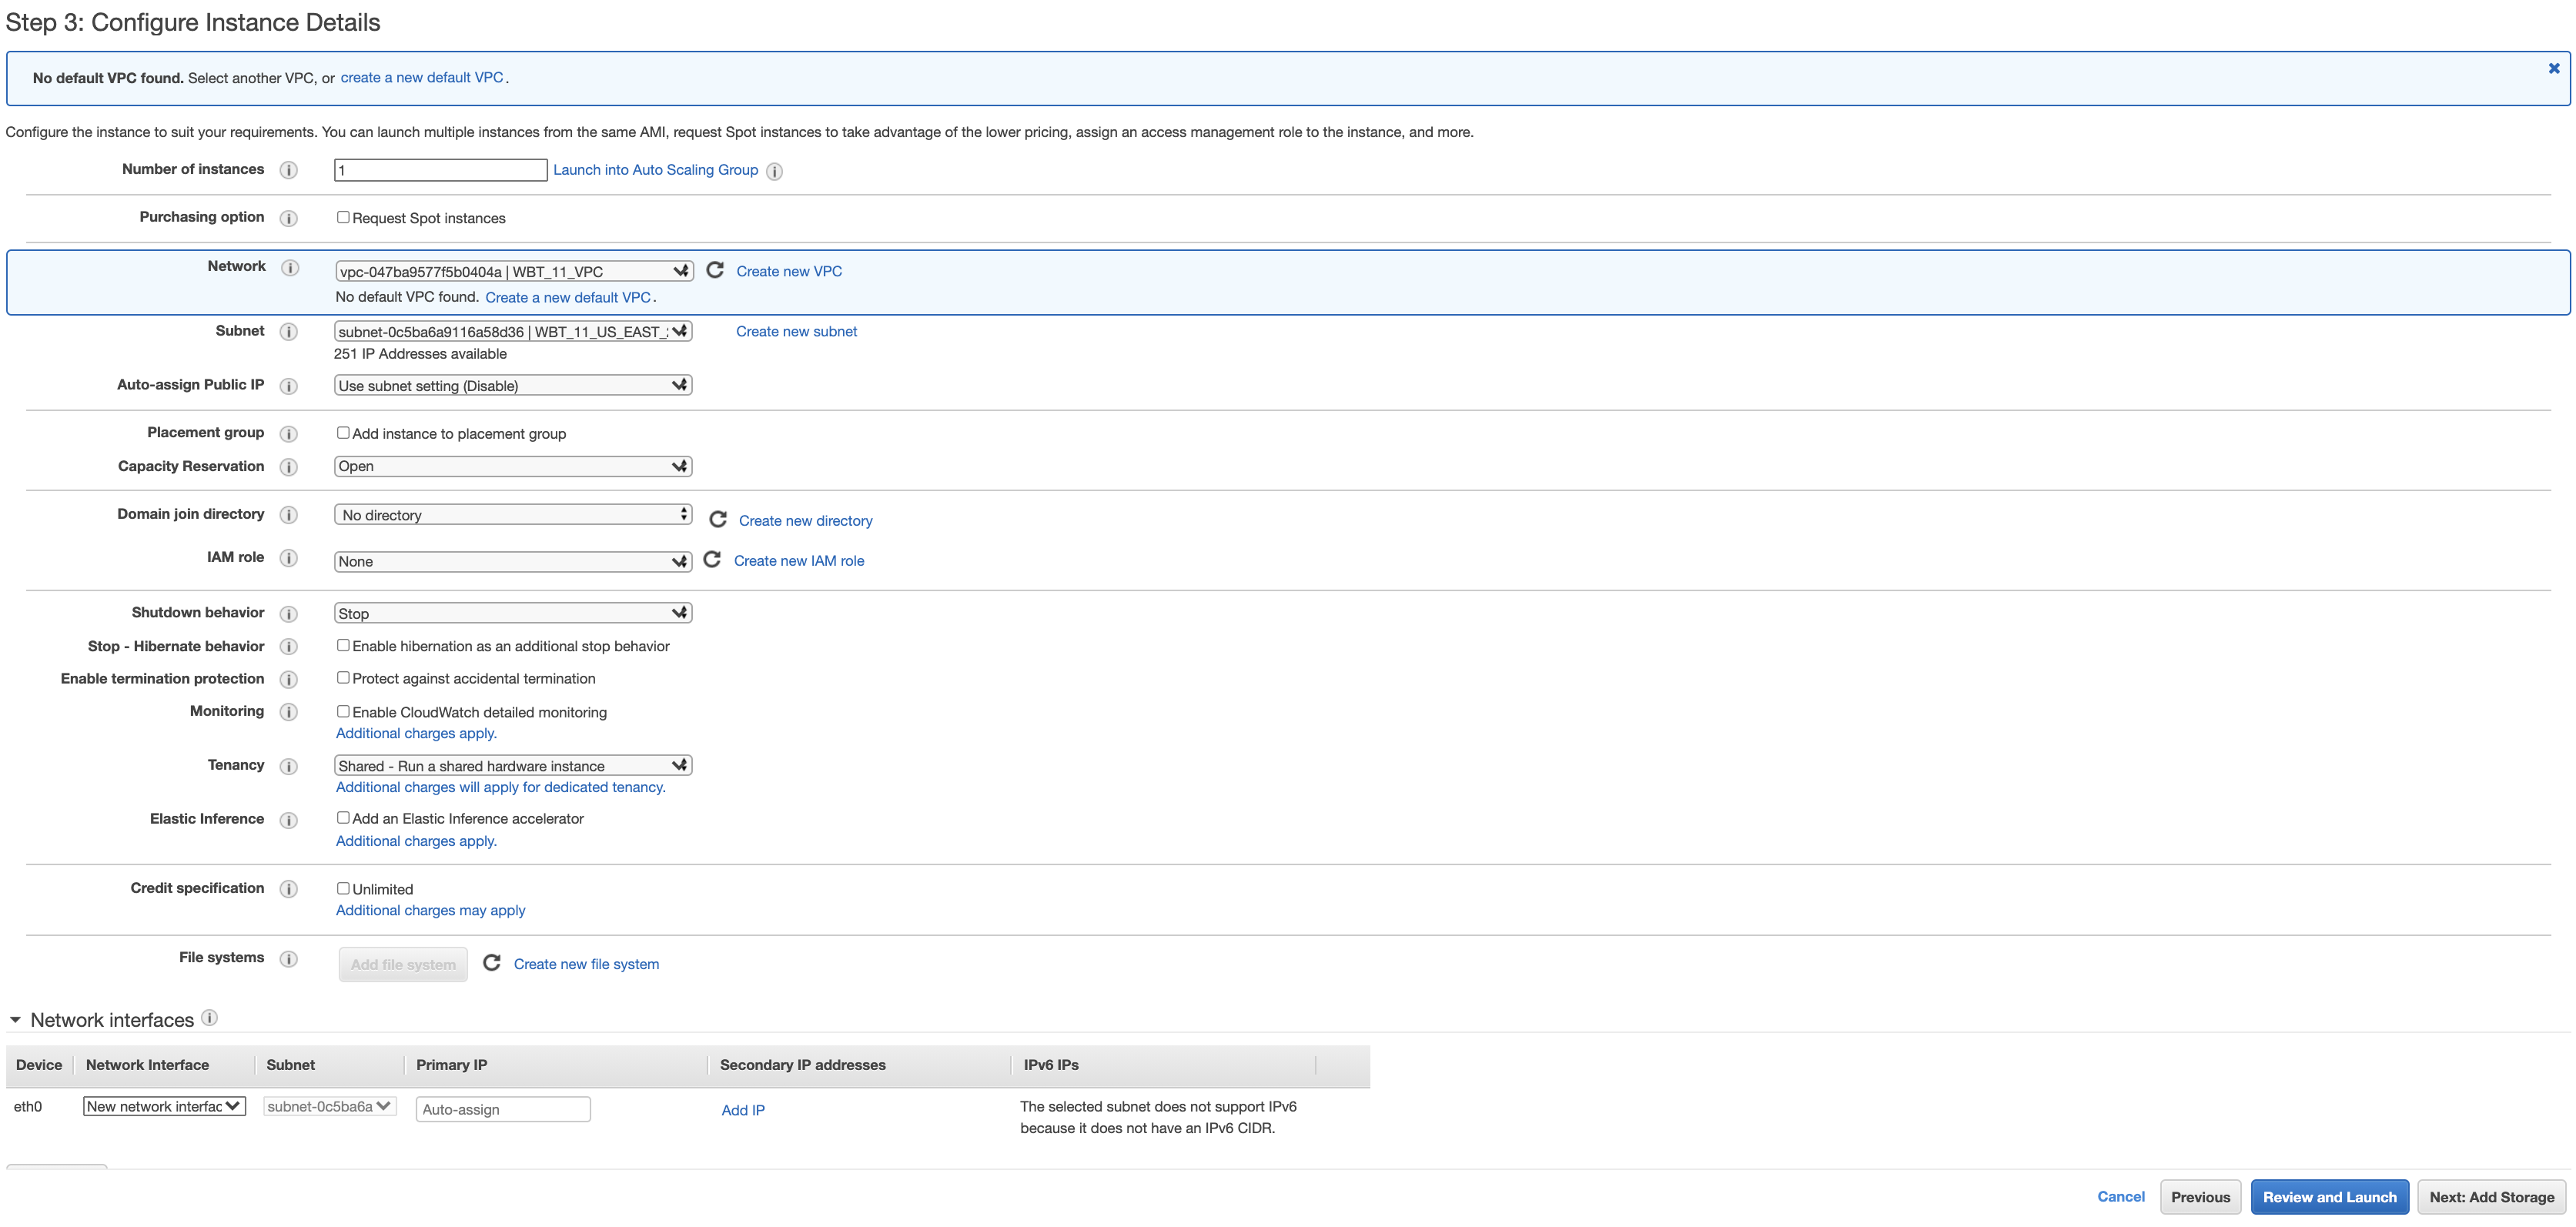
- In this step, choose the VPC and private subnet that we created. Click Next: Add Storage button on the bottom right.
- Let’s use default configuration for storage. Click Next: Add Tags button on the bottom right.
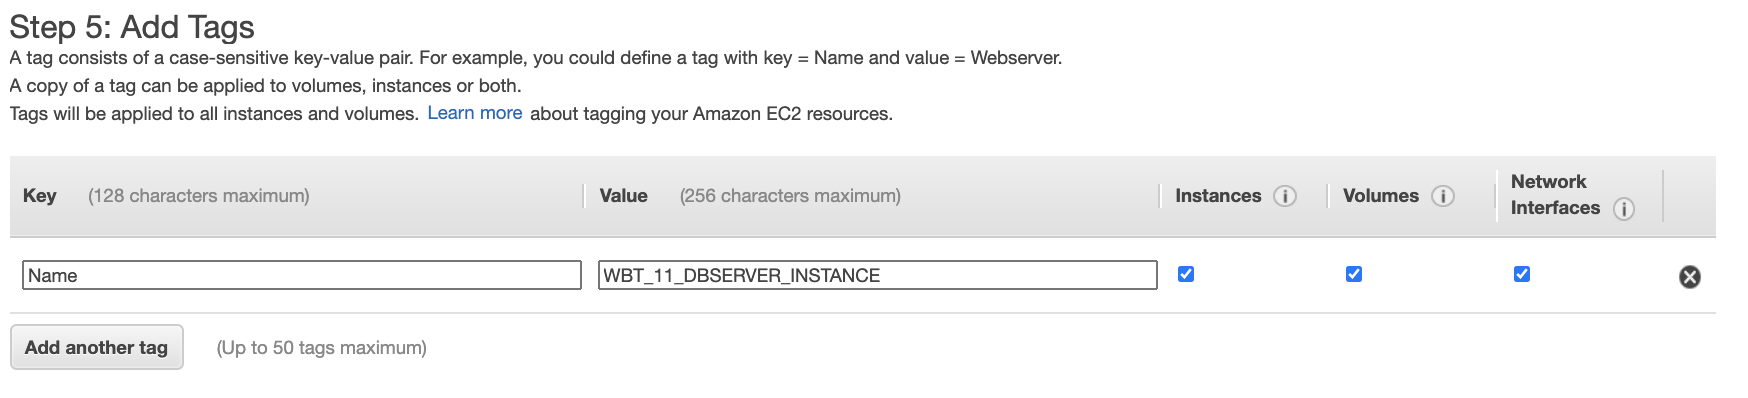
- Add tag that represent your instance to be easier for tracking. In this case, the key is Name and value is WBT_11_DBSERVER_INSTANCE. Click Next: Configure Security Group button.

- Select an existing security group for DB Server and click Review and Launch button.
- Review your configuration and click Launch button.
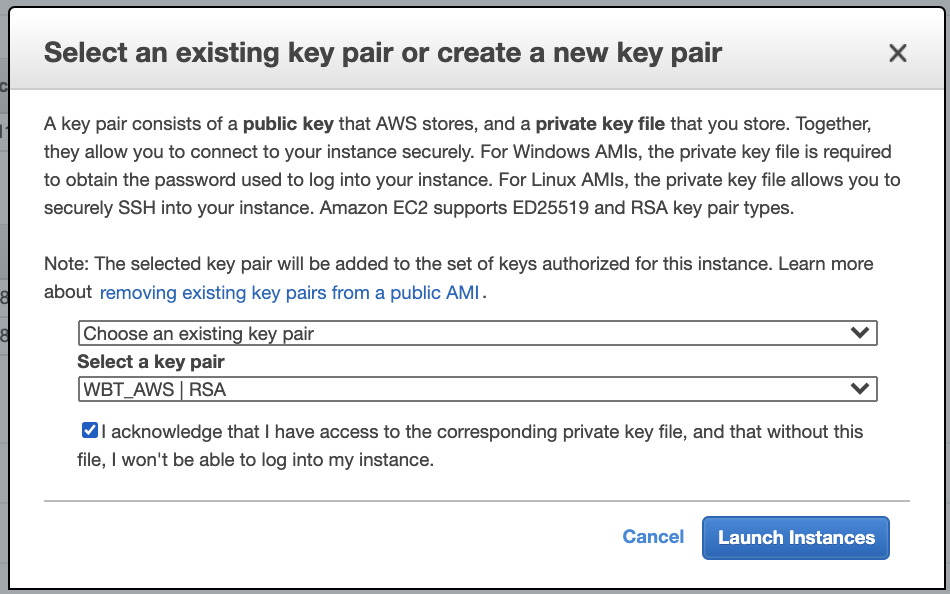
- Choose the same key pair that we created before and click Launch Instances button.
- Once the instance is running, we can verifying by uploading our private and public key to public instance with scp command:
> scp -i aws_rsa /<folder path>/.ssh/aws_rsa ec2-user@3.14.207.102:~/
> scp -i aws_rsa /<folder path>/.ssh/aws_rsa.pub ec2-user@3.14.207.102:~/
- Then let’s try to ssh to private instance from public instance.
> ssh ec2-user@3.14.207.102 -i aws_rsa
Last login: Wed Oct  6 03:04:03 2021 from 180.252.170.193

       __|  __|_  )
       _|  (     /   Amazon Linux 2 AMI
      ___|\___|___|

https://aws.amazon.com/amazon-linux-2/
11 package(s) needed for security, out of 35 available
Run "sudo yum update" to apply all updates.
[ec2-user@ip-11-0-1-108 ~]$ ssh ec2-user@11.0.2.231 -i aws_rsa
The authenticity of host '11.0.2.231 (11.0.2.231)' can't be established.
ECDSA key fingerprint is SHA256:a0gsAFtpOkEe6aGL2eykk9Lk/yitCJPhpg9eyobuaLs.
ECDSA key fingerprint is MD5:44:8d:ae:7d:c9:21:fc:53:0c:a3:df:6a:3a:f0:53:97.
Are you sure you want to continue connecting (yes/no)? yes
Warning: Permanently added '11.0.2.231' (ECDSA) to the list of known hosts.

       __|  __|_  )
       _|  (     /   Amazon Linux 2 AMI
      ___|\___|___|

https://aws.amazon.com/amazon-linux-2/
11 package(s) needed for security, out of 35 available
Run "sudo yum update" to apply all updates.
[ec2-user@ip-11-0-2-231 ~]$
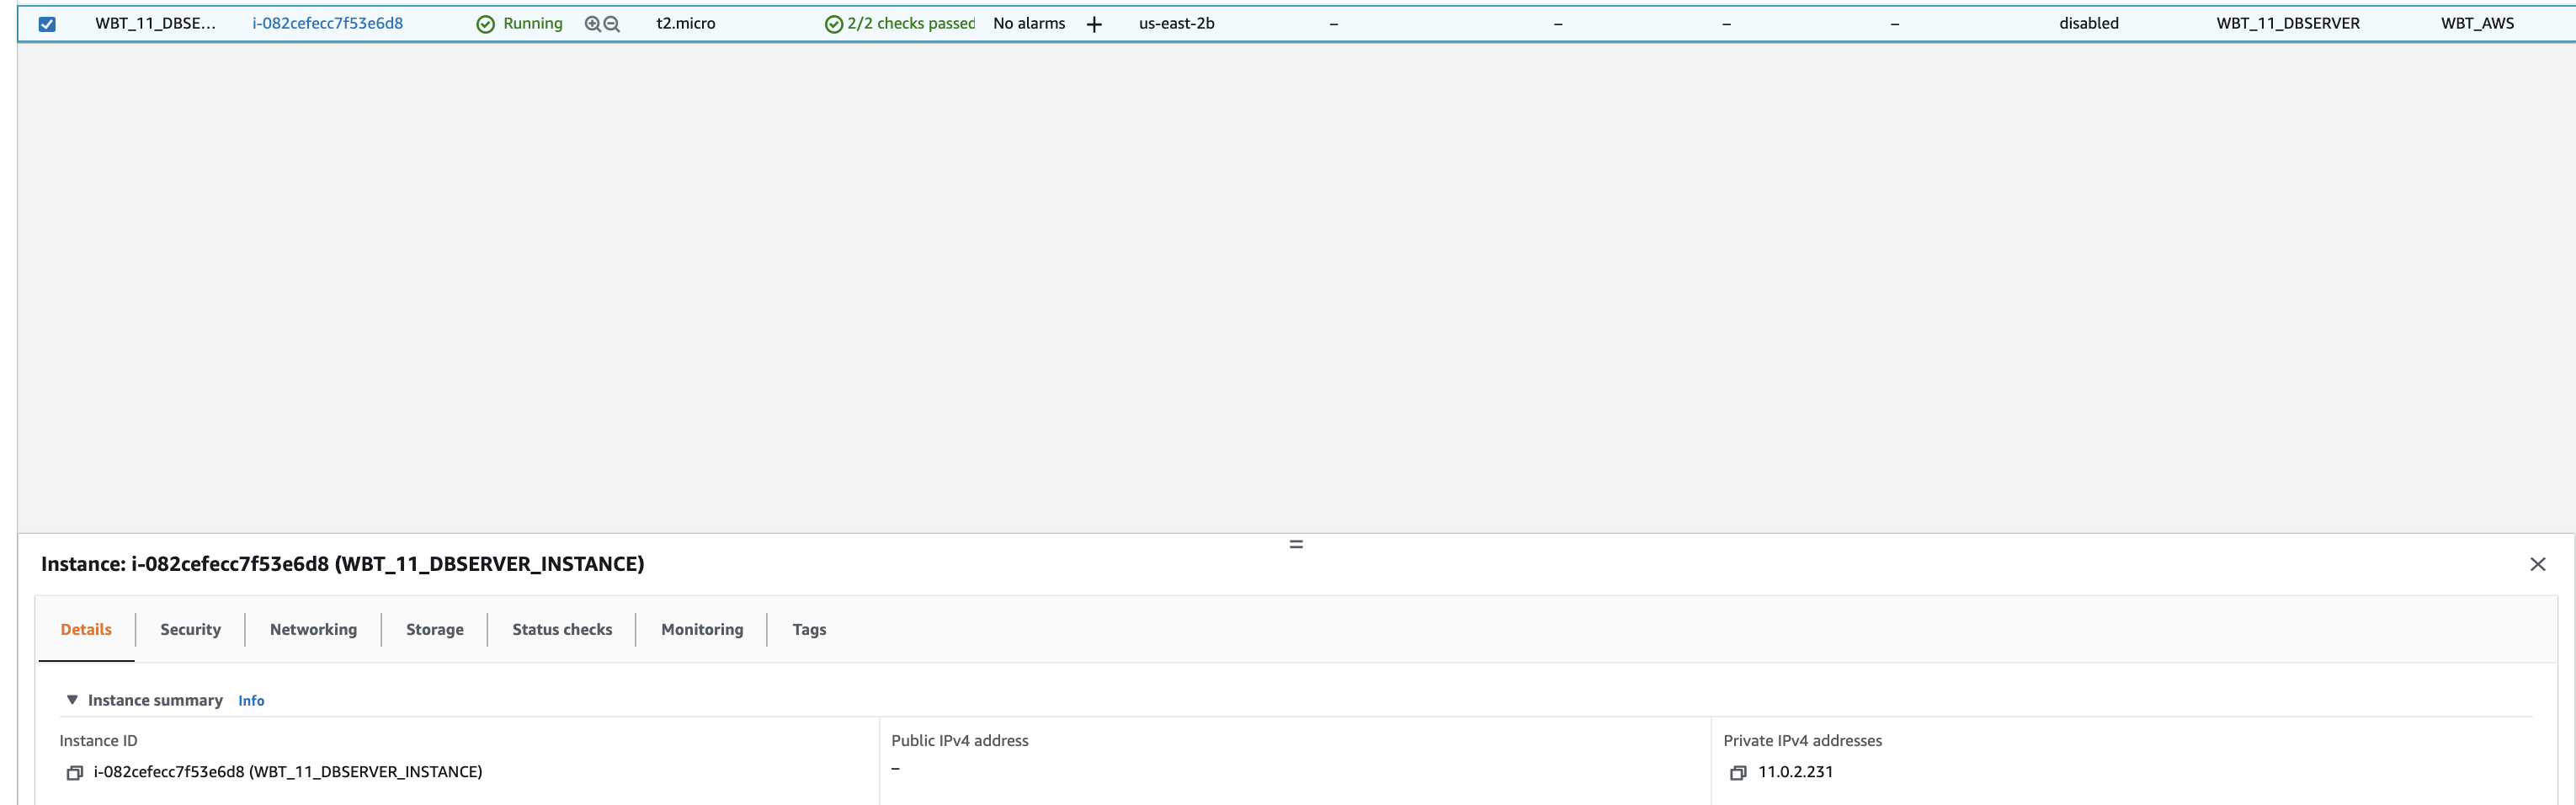
- In this case, 11.0.2.231 is my private instance IP. If you do not know what is your private instance IP, you can check it by select your private instance and the address will be shown on Details tab.
Conclusion
In this article, we are discussing about how to create key pair, public instance, and private instance. At this point, at this point we are ready to install web server in the public instance and install PostgreSQL in the private public.